Ultramarine Painter Starter Kit: Essential Tools, Paints, and Techniques
As someone who has been into miniature painting for around about two decades, I’m excited to share my knowledge and help you start on your journey of painting Ultramarines, the largest (And best) Space Marine chapter in Warhammer 40,000.
This huge guide will cover the basic tools, paints, and techniques you’ll need to create Ultramarine miniatures that will make your army looking fantastic. Whether you’re a novice or looking to improve your skills, this guide has something for literally everyone! Painting Ultramarines has it’s own challenges from getting the paints and symbols correct, read on to find out how!
Want to learn more about the Ultramarines? Read here for What are The Ultramarines?
Ultramarine Painter Starter Kit: Essential Tools
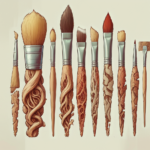
- Brushes: Read here for The Best Brushes for Painting Miniatures
- Size 2 brush for basecoating and larger areas
- Size 00 brush for detail work and edge highlighting
- Look for brushes with good snap and a fine tip, such as Winsor & Newton Series 7 or Raphael 8404
- Palette:
- A wet palette is ideal for keeping your paints moist and usable for longer periods
- Alternatively, a regular palette or even a ceramic tile can work well
- Water cup:
- Use a clean, stable container to hold your water for thinning paints and cleaning brushes
- Paper towels:
- Keep a stack of paper towels handy for wiping excess paint from your brushes and cleaning up spills
- Hobby knife:
- A sharp hobby knife is essential for removing mold lines and cleaning up your miniatures before painting
- Plastic cement:
- Use plastic cement to assemble your Ultramarine miniatures for a strong, seamless bond
Ultramarine Painter Starter Kit: Must-Have Paints
- Primers:
- Ultramarine Blue Primer spray for a great basecoat
- Black primerfor darker, shadowed areas
- White primer for brighter, highlighted areas
- Blues:
- Macragge Blue: The iconic base color for Ultramarines
- Calgar Blue: A lighter blue for layering and highlighting
- Kantor Blue: A darker blue for shading and defining recesses
- Fenrisian Grey: A pale blue for edge highlighting
- Metallics:
- Leadbelcher: A versatile silver for weapons, machinery, and trim
- Balthasar Gold: A rich gold for ornate details and iconography
- Shades and Washes:
- Nuln Oil: A black wash for shading and adding depth to recesses
- Agrax Earthshade: A brown wash for shading gold and creating a dirty, battle-worn look
- Supplementary Colors:
- Abaddon Black: A deep, matte black for lining, shadows, and details
- White Scar: A bright, pure white for extreme highlights and markings
- Evil Sunz Scarlet: A vibrant red for lenses, purity seals, and accent colors
- Rakarth Flesh: A warm, off-white for parchment and scroll work
- Mephiston Red: A deep red for purity seal wax and eye lenses

Ultramarine Painter Starter Kit: Techniques to Master
- Thinning your paints:
- Always thin your paints with a little water or medium to achieve smooth, even coats
- Multiple thin layers will yield better results than a single thick coat
- Basecoating:
- Start with a solid basecoat of the appropriate color, such as Macragge Blue for armor
- Be sure to cover all areas evenly, but don’t worry about achieving perfection at this stage
- Shading:
- Use washes like Nuln Oil or Agrax Earthshade to add depth and definition to recesses
- Be careful not to overload your brush to prevent pooling and tide marks
- Layering:
- Build up highlights and color transitions by applying thin layers of lighter colors, such as Calgar Blue, over the basecoat
- Leave the darker basecoat visible in the recesses for natural shading
- Edge Highlighting:
- Use the side of your brush to apply thin, consistent lines of a lighter color, like Fenrisian Grey, along the edges of armor plates and details
- This technique adds a crisp, sharp finish to your miniatures and makes them pop on the tabletop
- Drybrushing:
- Load your brush with paint, then wipe most of it off on a paper towel
- Lightly brush the raised areas of your miniature to create a textured, weathered appearance
- This technique is great for quickly highlighting textured surfaces like fur, cloth, or stone
- Applying Decals:
- Ensure the surface is clean and smooth before applying decals
- Cut out the desired decal and soak it in water for about 30 seconds
- Slide the decal onto the miniature and adjust its position with a damp brush
- Gently dab the decal with a paper towel to remove excess water and allow it to dry completely
- Apply a thin layer of Micro Sol or Lahmian Medium over the decal to help it conform to the surface and blend seamlessly
- Varnishing:
- Once your miniature is completely dry, apply a thin coat of matte varnish to protect the paint job and reduce the glossiness of washes
- For added protection, consider applying a layer of gloss varnish to areas prone to handling before applying the matte varnish
Worried about making mistakes? No dramas, all natural. Read our guide here on How To Fix Painting Mistakes on Miniatures
Ultramarine Painter Starter Kit: Advanced Techniques to Explore
- Non-Metallic Metal (NMM):
- Discover the magic of metallic surfaces using non-metallic paints
- This technique requires careful blending and an understanding of light and shadow
- Object Source Lighting (OSL):
- Simulate the effect of a bright light source, such as a glowing power sword or plasma gun, by painting the surrounding areas with gradually fading colors
- This technique can add a dynamic, eye-catching element to your miniatures
- Wet Blending:
- Blend two or more colors directly on the miniature while the paints are still wet
- This technique creates smooth, seamless transitions between colors, perfect for power weapons, glowing eyes, or gradient effects
- Freehand:
- Add unique designs, patterns, or chapter markings to your miniatures using freehand painting techniques
- Start with simple shapes and patterns, and gradually work your way up to more complex designs as you gain confidence and skill

Ultramarine Painter Starter Kit: Ultramarine Heraldry and Iconography
- Chapter Symbol:
- The Ultramarine chapter symbol is an inverted Greek letter Omega (Ω), typically painted in gold or white
- This symbol represents the chapter’s status as the last Legion created during the First Founding
- Company Markings:
- Each company within the Ultramarines has a unique color scheme for its trim and heraldry
- For example, the 2nd Company uses gold trim, while the 3rd Company uses red
- Incorporate these colors into your miniatures to denote their company allegiance
- Squad Markings:
- Squad markings, such as numbers or symbols, are often displayed on the right shoulder pad or knee plate
- These markings help identify individual squads within a company
- Veteran Markings:
- Veteran Marines, such as those in the 1st Company or the Victrix Guard, often display additional honors and heraldry
- This can include white helmets, laurel wreaths, or special shoulder pad trim
- Personal Heraldry:
- Some notable Ultramarines, such as Captains or characters, may have personal heraldry or unique color schemes
- Research these individuals and incorporate their distinctive elements into your miniatures for added depth and storytelling
Looking for some more passion or inspiration for Space Marine Heraldry? Head over to our guide for How To Make Space Marine Chapter Symbols
Ultramarine Painter Starter Kit: Realistic Battlefields and Dioramas
- Natural Bases:
- Create bettering looking miniatures by creating detailed, scenic bases that tell a story
- Use materials like cork, sand, rocks, and static grass to create realistic terrain
- Consider adding elements like fallen debris, discarded weapons, or Tyranid remains to hint at the Ultramarines’ many battles
- Battle Damage and Weathering:
- Add realism to your miniatures by depicting battle damage and weathering effects
- Use techniques like chipping, scratches, and paint wear to show the toll of countless engagements
- Use pigments, such as dust, mud, or soot, to show the gritty, war-torn nature of the Warhammer Universe
- Diorama Composition:
- Create interesting, detailed dioramas by carefully planning your composition
- Tell a good story by trying to bring in more elements, such as a battle in progress or the aftermath of a hard battle
- Lighting and Photography:
- Proper lighting is essential for showcasing your miniatures and dioramas
- Use a combination of diffused and directional light sources to highlight details and create depth
- Experiment with different backgrounds and camera angles to find the most striking composition
- Consider investing in a lightbox or portable photography setup for consistent, high-quality results
Read our full guide on How to Make Terrain for Warhammer
Ultramarine Painter Starter Kit: Expanding Your Ultramarine Collection
- Primaris Marines:
- Explore the new range of Primaris Marines to add cutting-edge technology and elite warriors to your collection
- Experiment with the color schemes and heraldry of Primaris-specific units, such as Intercessors, Hellblasters, and Inceptors
- Characters and Heroes:
- Collect and paint iconic Ultramarine characters, such as Marneus Calgar, Tigurius, or Roboute Guilliman
- Pay special attention to their unique wargear, colors, and heraldry to make them stand out on the battlefield
- Vehicles and Dreadnoughts:
- Expand your army with powerful vehicles like the Repulsor, Redemptor Dreadnought, or the mighty Land Raider
- Apply the same painting techniques and color schemes to create a cohesive, striking force
- Successor Chapters:
- Explore the many successor chapters of the Ultramarines, such as the Novamarines, Howling Griffons, or Sons of Orar
- Adapt the classic Ultramarine color scheme to create unique, yet familiar, variations that reflect these chapters’ identities and histories
Ultramarine Painter Starter Kit: Connecting with the Community
- Social Media:
- Join social media platforms like Instagram, Twitter, and Facebook to connect with fellow Ultramarine enthusiasts
- Share your work, seek feedback, and draw inspiration from the vibrant miniature painting community
- Forums and Discussion Boards:
- Join in online forums and discussion boards(Like DakkaDakka )dedicated to Warhammer 40,000 and miniature painting
- Ask questions, share tips, and join in friendly discussions with hobbyists from around the world, there are many facebook groups that discuss Warhammer for all languages!
- Local Gaming Stores and Clubs:
- Visit your local gaming store or join a Warhammer club to meet like-minded hobbyists in person. These can be a challenge to find at times in non-English speaking countries, but they do exist are the best way to meet people who also love Warhammer
- Go to painting workshops, tournaments, and events to learn new skills, showcase your work and learn from painters around the world!
- Conventions and Festivals:
- Keep an eye out for Warhammer and miniature painting conventions, such as Warhammer Fest or Adepticon
- These events offer a fantastic opportunity to really immerse yourself in the hobby.
Conclusion
With the right tools, paints, and techniques, you’ll be well on your way to creating stunning Ultramarine miniatures that will make your army stand out on the tabletop. Remember, practice makes perfect, so don’t be discouraged if your first attempts aren’t flawless. Keep honing your skills, experimenting with new techniques, and most importantly, have fun!
Looking for a step by step guide? The painters over at Goonhammer have a great guide!
As you progress in your painting journey, don’t forget to check out the Warhammer Universe YouTube channel for more in-depth tutorials, tips, and inspiration. The miniature painting community is vast and welcoming, so don’t hesitate to share your work, ask for feedback, and learn from your fellow hobbyists.
In the end, painting Ultramarines is not just about creating beautiful miniatures; it’s about bringing the rich history and lore of this iconic chapter to life on the tabletop. So, grab your brushes, unleash your creativity, and join the ranks of the Ultramarines! For the Emperor and the glory of Macragge!
Related posts:
 Common Mistakes to Avoid When Base Coating Models: Conquer These 3 Mishaps for Flawless Finishes

 What to Look for When Buying Brushes for Miniatures: 8 Mistakes You’ll Want to Avoid
 Recess Shading Warhammer Miniatures (And Other Tips to Level Up Your Painting Skills)


