How to Airbrush Weathering Effects on Miniatures (A Thorough Guide)
Greetings hobbyists! I’m Claude, lead writer at Warhammer Universe. With over 20 years of experience painting miniatures, I’m going to walk you through my best techniques for creating realistic weathering effects using an airbrush.
Whether you’re working on a 40K tank or fantasy terrain, weathering can add so much depth, realism and “life experience” to your models. My goal here is to produce battle-worn creations that look like they just rolled off the battlefield.
Looking for a new Airbrush? Read our full guide on The Best Airbrush for Painting Miniatures
Throughout this guide, I’ll cover:
- Our essential weathering products, tools and setup
- Pre-shading for extra dimension
- Building up colored coats and filters
- Creating worn effects like chipping, scratches and rust
- Using washes and pigments
I invite you to follow along on your own miniatures. And if you have any questions, feel free to drop them in the comments over on our Youtube channel where we also have lots of other helpful hobby content!
Alright, let’s get started weathering…

How to Airbrush Weathering Effects on Miniatures: Gearing Up!
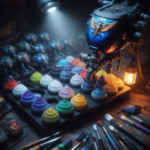
Here is our recommended arsenal of top-notch supplies:
Airbrush: Iwata HP-CS Eclipse
Compressor: Iwata Studio Series Power Jet Pro
Primer: Stynylrez Black Primer
Paints: Ammo by Mig Jimenez range
Clear Coats: Testors Gloss and Satin
Hairspray: Elnett Satin Hairspray
Oil Paints: Abteilung range
Enamel Washes: Ammo Dark Streaking Grime
Weathering Pencils: AK Interactive Light Rust
Pigments: Vallejo Mud & Sand Pigment
In addition to the best paints, washes and weathering media, proper preparation is also key. After construction, always prime your miniatures so subsequent layers adhere well. I prefer Stynylrez primer for its superb coverage.
Looking for tips on how to put all this gear together and use it? Read our Beginners Guide to Airbrushing Miniatures
How to Airbrush Weathering Effects on Miniatures: Airbrushing Dimension with Pre-Shading
With our model primed, we can lay down some pre-shading for extra dimension before adding color coats. This technique darkens recesses so shadows stand out more.
My approach is:
- 50:50 mix of Black and White basecoated overall, avoiding deepest crevices
- Pure White focused on the top ~60% of surfaces
- White + Dead White mix targeted on the ~30% most exposed areas
This changes surfaces from dark to light, creating almost a sketch for where shadows will fall. Now color coats will really pop!
How to Airbrush Weathering Effects on Miniatures: Building Up Coats
Next I airbrushed successive layers of lighter grey tones from Ammo by Mig:
- Dark Grey Base: overall solid coat
- Grey Base: left Dark Grey in recesses
- Grey Light Base: highlights covering ~60%
- Grey Highlight: highlights covering ~30%
Finally, most highlights were done with a 50:50 mix of Grey Highlight + Wolf Grey focused on the most exposed edges.
This blends the pre-shading nicely into more seamless highlights and shadows across armor panels. But for extra depth, I shot an overall blue filter using Ammo’s Filter for Panzer Grey thinned 1:1 with enamel thinner into the shadows and recesses. This cooling filter enhances that battle-hardened look!
Having issues building up coats due to un-smooth paints? Read our full guide on How To Get Smooth And Thin Airbrushed Coatings
How to Airbrush Weathering Effects on Miniatures: Clear Coats
Now I seal the basecoats and filter effect with a gloss coat before weathering. This smooth surface helps washes flow into details while protecting paint beneath. I use Testors Gloss in a rattlecan for convenience.
After a day to cure, weather away!
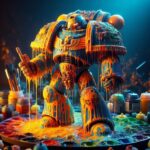
How to Airbrush Weathering Effects on Miniatures: Distressing Surfaces with Scratches and Chipped Paint
Time to make this paint job look well-worn! Using sponge or brush strokes:
- Sponge: Tear off a bit of foam and dab in paint, then blot onto model to create random chips
- Brush: Use pointed tip to manually paint fine scratches and chips
Focus wear on exposed edges and high-traffic areas like hatches. I used Rhinox Hide as a dark primer color exposed beneath the Grey layers.
After the paint dries, I take a fine brush with Stormhost Silver to add metallic scratches and nicks within the chips, suggesting damage down to bare metal.
How to Airbrush Weathering Effects on Miniatures: Building Rust Textures
Now to transform those paint chips into corrosion! Pigments are powdered paints perfect for weathering.
I dot on AK Interactive Light Rust pigments around damaged areas. Then use a wet brush to streak pigments downwards, mimicking rust dripping from wounds in the armor. So easy yet so realistic!
For fresh metal gouges, I shade them with softened graphite pencil. Rubbing the pencil tip over edges darkens them while depositing a metallic sheen, like scraped steel.
Looking to mix some colors together for your Airbrush? We got you covered here on How to Mix Colors For Airbrushing Miniatures
How to Airbrush Weathering Effects on Miniatures:Adding Grime with Enamel Washes and Oils
Let’s take the grunge up a notch!
First I flood surfaces with Ammo Dark Streaking Grime enamel wash straight from the bottle using a wide brush. This super thin liquid flows into every crevice.
After 5 minutes I gently wipe away excess wash with a cotton swab, leaving grime only in details. Repeat until sufficiently filthy!
For extra grime texture, I also drop random dots of Abteilung oil paints over the model and similarly streak them with a wide wet brush. The white spirit solvents thin the oils into semi-transparent veils.
I target oils towards the bottoms of surfaces where moisture would collect and streak. Such easy ways to accumulate tons of hard-worn crud!
Sealing It In
Finally, I spray the whole model with Testors Satin varnish. This seals in all the weathering while imparting a subtly flat sheen, perfect for military matte finishes.
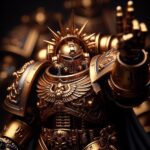
The end result: a miniature that looks like it survived intensive battle on the tabletop! Now ready to wage war alongside equally experienced comrades…
I hope you enjoyed this guide to airbrushing convincing weathered finishes using scaling modeling techniques adapted for miniatures.
This is Claude signing off. Good luck and happy hobbying!
Related posts:
 Airbrush Vs Brush Painting Miniatures: Inspiring You to Become a Painting Maestro
 Best Airbrushes for Painting Miniatures – 4 Amazing Airbrushes!
 Airbrush Maintenance & Cleaning for Miniatures: Power To Save Your Airbrush (5 Tips)
 What PSI Should I Airbrush Miniatures At?: The Perfect Number 1 Guide


