How to Fix Common Airbrushing Mistakes Ruining Your Miniatures
As a miniature painter with over 20 years of experience, I’ve made just about every airbrushing mistake in the book. Believe me when I say that an airbrush can transform your miniatures from mundane to magnificent when used properly. However, it’s very likely going to be a learning curve. From clogged tips to blotchy coverage, I want to share the most common airbrushing mistakes I see miniature painters make, as well as my best troubleshooting advice.
My goal is to help you avoid frustration so you can unlock the full potential of your airbrush. At Warhammer Universe, we’re passionate about this hobby and want to see your minis come out looking their absolute best! So let’s dive in and conquer those airbrushing mistakes finally.
Common Airbrushing Mistakes: Picking the Wrong Airbrush for Miniatures
It can be hard to find the correct Airbrush for your work, However, there are certainly airbrushes better suited for the intricate detailing that miniatures require.
Read a full guide here for The Best Airbrushes For Miniatures
Nozzle and Needle Sizes
A 0.2mm or 0.3mm nozzle is ideal for detail work. I would only go up to 0.5mm at the absolute max. Any larger and you lose precision. Match your nozzle size to the corresponding needle diameter for optimal paint flow.
Looking for more information on Nozzles? We recommend this blog here! Airbrush Nozzles and Needles
Gravity vs Siphon Feed
Gravity fed airbrushes hold less paint but offer better visibility of your work. Siphon feed airbrushes have more paint capacity but make detail work more challenging. For miniatures, I strongly recommend a gravity feed.
Dual vs Single Action
Dual action airbrushes give you control of both paint flow and airflow pressure with the trigger and allow for delicate, gradual effects. Single action is more temperamental. Always opt for a dual action airbrush.
Build Quality and Ease of Cleaning
Cheaper airbrushes may frustrate you to no end with constant clogs and maintenance. Spend a bit more for quality and you’ll save yourself headaches in the long run. Make sure to choose an airbrush known for easy disassembly.
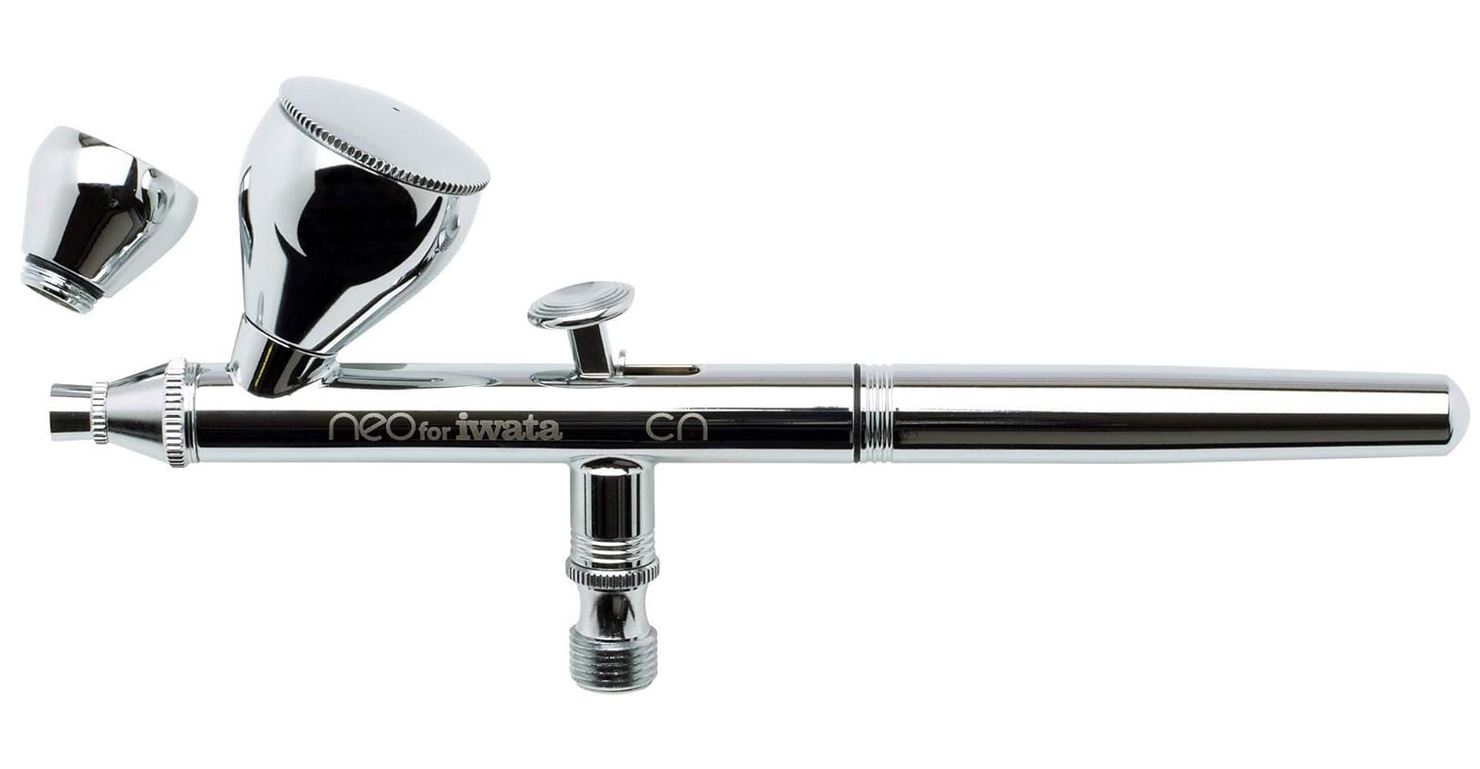
For my money, I would point any starting miniature painter towards an Iwata Neo CN gravity feed dual action airbrush for its balance of fine detail capabilities and ease of use straight away, out of the box.
Want to try something different? Read here for How To Paint Skin Tones on Miniatures
Common Airbrushing Mistakes: Incorrect Paint Consistency and Thinning
Looking for some more tips? Read here for a full overview on a Guide for Airbrushing Miniatures
Nailing down the optimal paint consistency can be incredibly frustrating at first. Paint that’s too thick can readily clog tip dry. Overthin your paints on the other hand, and you may as well be spritzing your mini with juice! Here are my top tips:
Only Use Airbrush Paints
Don’t bother trying to thin down regular acrylics with an airbrush. Trust me, it’s more trouble than it’s worth. Use proper airbrush ready miniature paints from quality brands. Army Painter, Vallejo, and Badger all make excellent options.
Gradually Thin in Small Amounts
Add thinner slowly and test the consistency frequently on paper. Stop when the paint reaches the texture of skim milk. For gravitation airbrushes, it should steadily drip off a plastic pipette tip without running.
Use Thinner AND Flow Improver
Thinner reduces viscosity but doesn’t prevent tip dry. Flow improver maintains moisture and delays drying. For flawless flow, use both in a 60/40 ratio of paint to thinner/improver.
Apply Light Coats
Resist the urge to lay down thick coats to cover faster. Several light layers always produce better results than one gloopy coat. Frequently clean the needle tip in between passes. slowly build up coverage.

Common Airbrushing Mistakes: Air Pressure Problems
Dialing in the right air pressure for your miniature paints can also be an exercise in frustration. Set it too high, and spidering occurs as paint jets irregularly from the tip. Too low, and paint barely sputters out or requires you to pull the trigger much farther back to make the fluid flow more easily.
PSI Issues? Check out our guide here for What PSI For Airbrushing Miniatures
Use Appropriate Moisture Traps and Gauges
Install moisture filters to prevent water in your airline from spraying onto the model. Also use regulators, valves, and gauges to finely adjust pressure between 10-40 PSI .
Adjust Based on Paint Viscosity
Thinner paints require less pressure to atomize properly. Start low around 15 PSI. Slowly increase pressure until you get an even conical spray pattern without sputtering.
Test on Paper or Plastic Spoon
Dial in pressure with test sprays rather than directly on your model. Adjust up or down in increments of 1-2 PSI based on results. Consistency is key!
Don’t Overdo Trigger Pull Back
Pull the trigger back just enough to start flow rather than 100%. More trigger pull requires more pressure to atomize paint. Keep pull back minimal for greater control.
Common Airbrushing Mistakes: Tip Dry and Clogging Frustrations
Nothing is more frustrating than suddenly losing all paint flow mid-airbrush due to tip dry or clogs. Luckily with a bit of care and maintenance, these common issues can easily be minimized or avoided entirely.
Airbrush maintenance and cleaning is a huge part of getting your paints correctly done. Read a full guide here for Airbrush Maintenance and Cleaning for Miniatures
Clean Components Frequently
I can’t stress this enough – diligent cleaning will save you so much grief! Use appropriate cleaner designed for airbrushes. Disassemble and thoroughly clean components often.
Lubricate O-rings
Remove and lubricate all o rings routinely to prevent binding and seizing from dried paint. I recommend using silicone grease on all o rings and threads.
Polish Needles
Over time, microscopic grooves in the needle can allow paint to stick and clog. Gently polish needles with ultra fine grit sandpaper to restore a smooth finish.
Use Moisture Traps
Install an inline moisture trap to catch any droplets of water from your compressor before they reach the airbrush and exacerbate drying.
Apply Release Agent
Consider applying a release agent like polyurethane varnish or liquid mask to metal components prone to paint build up and tip dry issues.
Want to try painting Metallics? An Article here for How to Airbrush Metallic paints on Miniatures
Maintain Humidity
Work in a humid area around 40% RH. Drying time accelerates exponentially past this point. Use a spray booth with humidity controls for professional results.
Messy Overspray and Poor Coverage
While often operator error, occasionally poor spray performance stems from issues within the airbrush itself. Don’t overlook inspecting components if cleaning fails to improve spray quality.
Replace Faulty Parts Promptly
From loose housing screws to damaged needle tips and bent fluid tips, flawed components directly impact functionality. diagnose issues early and order genuine replacement parts.
Verify Proper Assembly
Double check that all components are properly assembled before blaming the airbrush. Ensure the needle fully seats into the fluid tip opening.

Inspect for Air Leaks
Feel along the airhose and listen closely for any audible hissing indicating escaping air. Tighten fittings or apply thread tape to eliminate leaks.
Also make sure your PSI is correct, not sure what the correct PSI is? Read here for What PSI I Should Use for Airbrushing Miniatures
Send Out for Servicing
When all else fails, consider sending your airbrush out to an authorized service technician for professional overhaul and repair work to restore performance.
Wrapping Up
As you can see, most common airbrushing mistakes simply come down to lack of familiarity with proper set up and basic maintenance. Now that you’re armed with my top troubleshooting tips, you’ll be prepared to unlock the real magic of your airbrush. No more uneven finishes or random sputtering and spidering paint to ruin an otherwise flawless paint job!
I hope you’ve found these pointers helpful. If you have any other airbrushing questions, feel free to ask our team of miniature painting experts over at Warhammer Universe.