Optimizing Model Orientation for Resin 3D Printing: Warhammer Miniature Tips for Success
First, let’s understand why model orientation matters. Orienting your model correctly can:
- Reduce peel force and minimize print failures
- Improve surface finish and reduce visible layer lines
- Optimize support placement for easier removal and better results
- Decrease printing time and resin consumption
Here are some key factors to consider when 3d Printing
Proper Model Orientation is Key
- Reduces peel force and minimizes print failures
- Improves surface finish and reduces visible layer lines
- Optimizes support placement for easier removal and better results
- Decreases printing time and resin consumption
Choose the Right Resin
- Select resin based on project requirements and printer specifications
- Low-viscosity and fast-curing resins for fast printing
- High-viscosity and high-hardness resins for high resolution
️ Calibrate Your Printer
- Adjust build plate level and height for better first layer adhesion
- Evaluate UV light exposure time and intensity for optimal curing and detail
- Fine-tune build plate lift speed and distance for improved peeling and durability
Optimize Your Model Using Software
- Consider model orientation and position for better support placement and printing time
- Utilize hollowing and infill settings to influence resin consumption and weight
- Adjust slicing and layer height for desired resolution and smoothness
Determine the Best Angle
- Flat surface prints: 30⁰-45⁰ angles yield best results
- Figurines, miniatures, and humanoid prints: 10⁰-15⁰ angles work well
️ Add Strategic Support Structures
- Crucial for overhangs, bridges, islands, and heavy parts
- Use slicer software to generate and customize supports
Clean and Cure Your Model
- Remove uncured resin and improve strength and appearance
- Post-processing steps: cleaning, drying, curing, and optional sanding and painting
Continuous Learning and Improvement
- Stay engaged with the 3D printing community
- Attend workshops, webinars, and experiment with new approaches
Now, let’s dive into the factors you should consider when orienting your model for resin 3D printing.
Choose the Right Resin
Selecting the appropriate resin for your project is essential. Different resins have varying properties, such as viscosity, hardness, color, and curing time.
Consider your design requirements and printer specifications when making your choice. For fast printing, opt for low-viscosity and fast-curing resins. If you prioritize high resolution, go for high-viscosity and high-hardness resins.
Calibrate Your Printer
Proper printer calibration ensures accurate and consistent results. Check and adjust the build plate level and height, as this affects first layer adhesion and quality. Evaluate the UV light exposure time and intensity, which impact curing and detail.
Lastly, examine the build plate lift speed and distance, as they influence peeling and model durability. Use calibration test prints to fine-tune these settings for your specific resin and printer.
Optimize Your Model
Before printing, use software to check for issues that could affect printability. Consider the model’s orientation and position, as this can impact support structures and printing time.
Hollowing and infill can influence resin consumption and weight, while slicing and layer height affect resolution and smoothness. Use slicer software to edit and preview your model before printing.
Determine the Best Angle
The optimal orientation angle depends on your model’s shape and size. For flat surface prints, angles between 30⁰ and 45⁰ generally yield the best results. You can use the formula “Orientation angle(⁰) = arctan (layer height/pixel width)” to calculate the perfect angle for your printer.
For figurines, miniatures, and humanoid prints, angles between 10⁰ and 15⁰ work well, as they reduce cross-sectional area while placing supports in less visible locations.
Add Support Structures
Support structures are crucial for overhangs, bridges, islands, and heavy parts. Add supports to any overhang or bridge that extends beyond 45 degrees from the vertical axis. Strategically place supports to be effective yet easy to remove.
Use lighter supports for delicate features and heavier ones for larger overhangs. Slicer software can help you generate and customize support structures for your model.
Clean and Cure Your Model
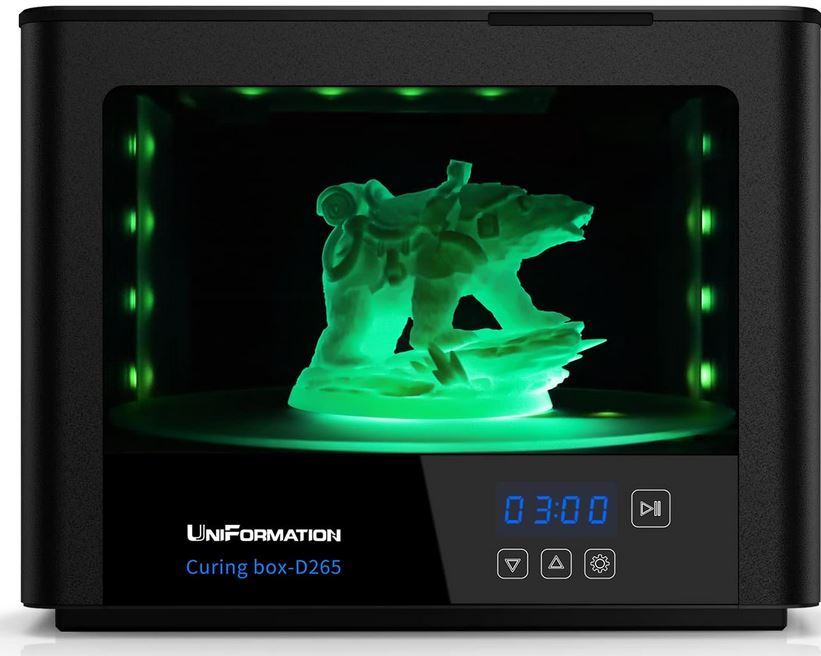
Post-processing is essential for removing uncured resin and improving the strength and appearance of your model. After removing the model from the build plate and detaching supports, wash it with isopropyl alcohol or a similar solvent. Dry the model with a paper towel or air blower, then cure it using a UV lamp or sunlight to harden and stabilize the resin. Always wear gloves and eye protection when handling uncured resin and cleaning solvents.
Understanding Layer Lines and Resolution
Layer lines are a common artifact in 3D printing, but they can be minimized with proper orientation. Printing at an angle helps reduce the visibility of layer lines, especially on flat surfaces. Keep in mind that your printer’s resolution, determined by factors like layer height and pixel size, also affects the prominence of layer lines. Experiment with different layer heights and orientations to find the best balance between print quality and speed.
Dealing with Challenging Geometries
Some models, such as those with intricate details, overhangs, or interlocking parts, can be particularly challenging to orient for resin 3D printing. When dealing with complex geometries, consider the following:
- Orient the model to minimize the number and size of overhangs
- Ensure that intricate details are adequately supported
- Position interlocking parts at an angle to prevent fusing during printing
- Use 3D design software to split complex models into smaller, more manageable parts
Leveraging Slicing Software Features
Slicing software like ChiTuBox, Lychee Slicer, and PrusaSlicer offer a range of features to help you optimize your model orientation. Take advantage of tools like:
- Auto-orientation: While not perfect, auto-orientation can provide a good starting point for finding the optimal angle
- Support generation: Customize support settings to balance printability and ease of removal
- Hollowing: Reduce resin consumption and printing time by hollowing out thick parts of your model
- Island detection: Identify and fix unsupported areas that could lead to print failures
Troubleshooting Common Issues
Even with careful orientation and support placement, issues can still arise during printing. Some common problems include:
- Suction cups: Hollow models or concave surfaces can create suction, causing parts to stick to the resin tank. Add drainage holes or orient the model to minimize suction.
- Warping: Insufficient support or uneven curing can lead to warping. Ensure adequate support and maintain consistent exposure settings.
- Layer separation: Poor layer adhesion can cause layers to separate. Verify that your resin is well-mixed and not expired, and ensure your printer is properly calibrated.
If you encounter any of these issues, don’t be discouraged. Troubleshoot the problem systematically, and consult resources like online forums, manufacturer support, or our Warhammer Universe community for guidance.
Continuous Learning and Improvement
The world of resin 3D printing is constantly evolving, with new technologies, materials, and techniques emerging all the time. To stay at the forefront of this exciting field, commit to continuous learning and improvement. Regularly engage with the 3D printing community, attend workshops or webinars, and experiment with new approaches to model orientation and optimization.
Post-Process for Perfection
While optional, post-processing can significantly enhance the quality of your model. Sand and polish to smooth out layer lines and imperfections. Paint and coat your model to add color and protection. If your model consists of multiple parts, glue and assemble them using appropriate tools and materials.
At warhammer-universe.com, we’re dedicated to providing you with the knowledge and resources you need to excel in resin 3D printing. Be sure to check out our YouTube channel for more helpful guides and interesting videos on miniatures, 3D printing, and the Warhammer universe.
By following these expert tips and tricks, you’ll be well on your way to optimizing your model orientation and achieving stunning resin 3D prints. Remember, practice makes perfect, so don’t be afraid to experiment and learn from your experiences. Happy printing!
Related Articles
- Unleash Successful Tactics on the Battlefield
- Dive into our guide covering tactics for best 3D printers to boost your battlefield success. Discover top-notch strategies for miniature enthusiasts.
- Masterful Solutions to Printer Bed Woes
- Seeking answers to 3D printer bed adhesion problems? Our troubleshooting guide provides a comprehensive how-to for resolving issues. Elevate your printing game with expert insights.
- Crafting Custom Miniatures: A Beginner’s Guide
- Embark on a creative journey with our guide on how to create custom miniatures. Perfect for beginners, this guide unlocks the world of personalized figurines.
- Prime and Paint Like a Pro: Beginner’s Edition
- Elevate your miniature painting skills with our beginner-friendly guide on how to prime and paint 3D printed miniatures. Uncover techniques to bring your creations to life.
- 3D Printing Warhammer Armies: A Comprehensive Guide
- Delve into the realm of Warhammer armies with our detailed guide on 3D printing Warhammer miniatures. From printing to painting, preserve your army with expert advice.
- Nozzle Size Matters: Choosing the Right Fit
- Navigate the significance of nozzle size in 3D printing. Discover why nozzle size matters and how to make the perfect choice for your printing endeavors.
- Embark on Miniature Printing Adventures
- Ready to start printing your own miniatures? Our guide on getting started with 3D printing is perfect for beginners. Unlock the secrets of creating your unique figurines.
- Pro Tips for 3D Printing Warhammer Figures
- Enhance your 3D printing skills with our pro tips for 3D printing Warhammer figures. Elevate your craft with valuable insights and techniques.
- Discover, Print, and Play: A Miniature Guide
- Explore the world of Warhammer with our guide on how to find and print miniatures. Uncover the joy of discovering and printing your favorite models.
- Legal Insights: 3D Printing Warhammer in 2024
- Stay informed on the legal aspects of 3D printing Warhammer. Our guide on is 3D printing Warhammer legal in 2024 provides essential information for hobbyists.


