3D Printing Warhammer 40K Terrain: A Guide for Beginners
Why Get Into 3D Printing for Warhammer Terrain?
The technology of 3D printing has advanced rapidly, making high quality desktop 3D printers widely accessible. This opens up exciting opportunities for tabletop gamers to design and print our own custom terrain, buildings, accessories, and potentially even miniatures to enhance our hobby.
As much as we may love the official Citadel terrain kits, being able to print the exact terrain pieces and layouts we want without being limited by commercial availability is incredibly empowering. Plus it can be a major cost savings compared to buying all pre-made terrain!
Custom 3D printed terrain also allows for more creativity, modification, and personalization compared to off-the-shelf pieces. We can print buildings, walls, ruins, LOS blockers, objectives markers, and accessories tailored exactly for the armies we play and themes we want to represent on our battlefields.
Getting Started with 3D Printing
Here are the key steps for total beginners to start your journey printing tabletop terrain and getting set up with this somewhat confusing new aspect of your hobby:
1. Choose a 3D Printer – FDM vs Resin
The first decision is choosing what type of 3D printer to purchase. The two main consumer 3D printing technologies are:
FDM (Fused Deposition Modeling): FDM printers work by heating plastic filament and extruding it in layers onto a print bed to slowly build up a 3D object.
Key Attributes:
- Lower cost (under $300 for starter machines)
- Larger print beds best suited for terrain pieces
- Affordable filament (as low as $20 per kg spool)
- Easy setup – often just requires basic assembly
Resin Printers (SLA/DLP): Resin 3D printers use UV light to selectively cure photosensitive resin in a vat layer-by-layer to construct highly detailed prints.
Key Attributes:
- Exceptionally high detail quality perfect for miniatures
- Higher per-print material costs
- Smaller maximum print beds
- Additional safety considerations and post-processing requirements
For most wargamers looking to print terrain, props, and scenery, I recommend starting out with an entry-level FDM printer such as the Creality Ender 3 or Ender 3 Pro. These deliver surprisingly good print quality at low cost with a large 220 x 220 x 250mm build volume suitable for even large terrain pieces.
Advanced hobbyists looking to print miniatures or small intricate terrain details may want to consider a resin printer, but they require more workflow complexity. Read our guide here for The Best 3d Printers
2. Assemble and Calibrate Your Printer
Once you receive your 3D printer in the mail, carefully assemble it by following all manufacturer instructions. Take care not to overtighten screws or damage any components.
Be sure to carefully calibrate and level the print bed to ensure your first layers adhere properly when printing. Most printers come with instructions on how to do this – it just involves using the knobs under the bed to minutely adjust its height at each corner.
I also recommend printing one of the sample model files included on the SD card that came with your printer to confirm everything is functioning as expected before moving on to more advanced prints. Consider watching tutorials specific to your printer model on YouTube for any additional tips.
3. Install Slicing Software
To prepare digital 3D model files for printing, you need “slicer” software to process the objects into printer-ready code instruction files.
The most common free slicers used in 3D printing are:
- Cura – Easy to use slicer perfect for beginners and well-supported by the 3D printing community.
- PrusaSlicer – Powerful advanced features. Works very well for Prusa printers.
Download and install your choice of slicer software to your computer, laptop, or Raspberry Pi connected to your printer. There are tons of great tutorials on YouTube explaining all the settings.
4. Find or Create Terrain STL Files
Now it’s time to hunt down some cool Warhammer terrain model files! These need to be in .STL format to be compatible with slicers and 3D printers.
Here are some great sites to find .STL files:
- Thingiverse – Massive repository of models, including wargaming terrain to download for free
- Yeggi – Customizable search engine for 3D printable models
- Cults3D – Model marketplace with paid and free options
- MyMiniFactory – Excellent terrain selection suited for wargames
Many Terrain STLs can be bought affordably from independent designers on sites like CGTrader, Etsy, and MyMiniFactory. Or you can learn to create your own custom terrain designs using free 3D modeling tools like Tinkercad or Fusion 360!
5. Slice and Print Your Terrain!
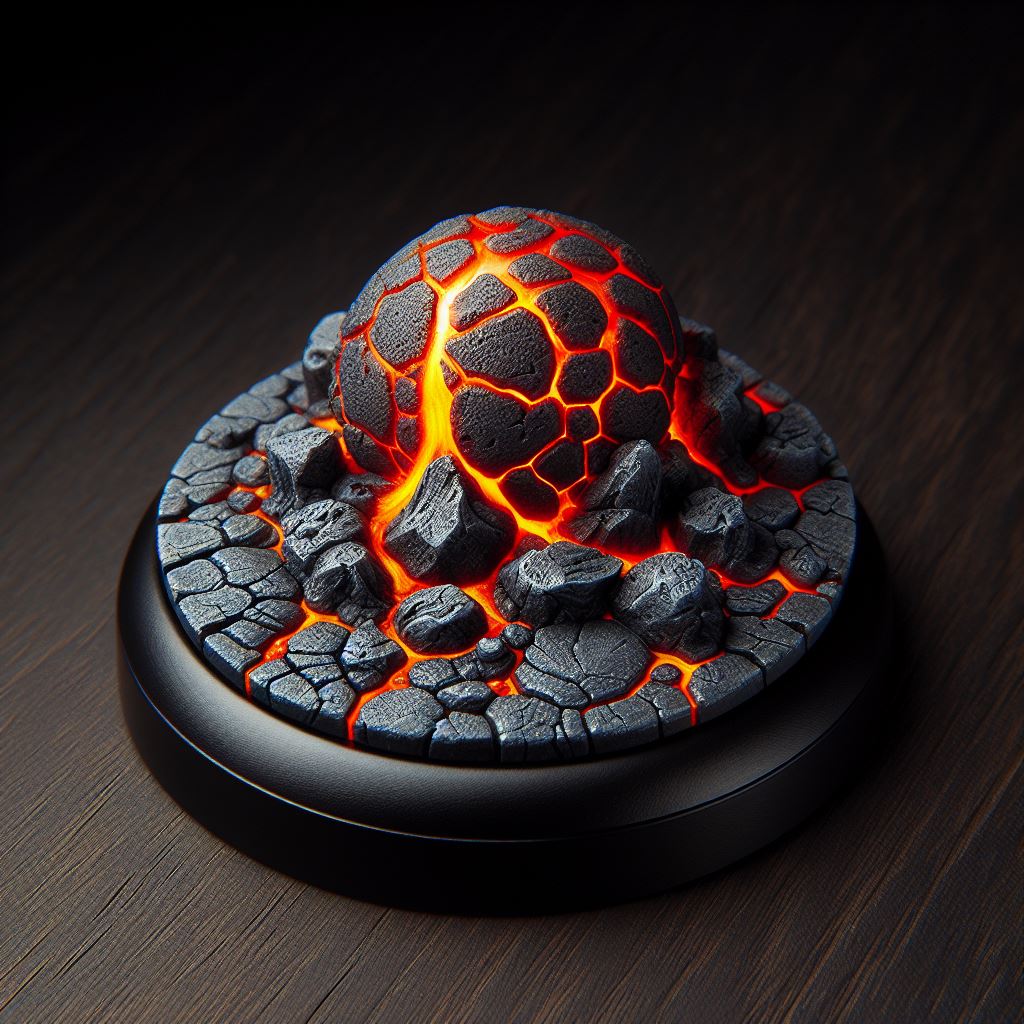
Volcano Terrain Piece With downloaded STL files in hand, it’s time to start printing! Open your model in the slicer, select optimal print settings for terrain, and export the newly sliced gcode file to your printer’s SD card.
Carefully monitor the initial layers as they print to ensure proper bed adhesion, then let the extruder work its magic! Well-tuned FDM printers can achieve impressive detail suitable for wargame terrain and build complete large pieces in just hours.
As you print more, take notes on what settings work best for you and make incremental tweaks to dial in print quality. There are fantastic Facebook groups and subreddits to help troubleshoot any issues. Advanced modifications like direct drive extruders, all-metal hotends, and flexible build surfaces can also enhance results.
6. Finish and Paint Your Terrain
Orc Fortress Terrain Piece When your terrain finishes printing, detach it carefully from the bed and remove any temporary supports or brims cleanly using flush cutters. Give the parts a quick sand or file pass if needed to smooth surfaces.
Wash prints in warm soapy water if desired prior to priming. Ensure pieces are completely dry before starting painting. Prime terrain using spray paint or brush-on primer in your choice of color scheme.
You can then paint models just like traditional Citadel miniatures and terrain using acrylic craft paints, citadel paint pots, or scale model acrylic paints paired with quality synthetic brushes. Dry brushing tends to work very well on 3D printed pieces to help hide layer lines.
Consider using weathering pigments, decorative tufts, static grass and cork bark to blend prints seamlessly with other terrain for ultra realistic tabletop battlefields! Clear coat finished builds with matte varnish spray to protect your artwork and dull shiny filament.

Key Accessories and Upgrades for Better 3D Printing
Here is some extra equipment beyond just the printer itself that I recommend having on hand:
- Filament – High quality PLA+ filament gives great prints suitable for terrain while being easy to print at low temperatures. Have a variety of colors!
- Isopropyl Alcohol + Microfiber Cloths – Useful for cleaning the print surface. Helps bed adhesion.
- Metal Scraper – To safely remove stuck filament and prints.
- Flush Cutters – Quickly trim away print supports without damaging surfaces.
- Nozzle Brush – Helps clean gunk out of printer nozzle when changing filament.
- Calipers – Precision measurement tool useful for checking print dimensions.
And some worthwhile cheap upgrades that are easy to install and provide noticeable improvements:
- Yellow Bed Springs – Aftermarket springs reduce need for re-leveling.
- Glass Print Bed – Creates a super flat and durable print surface.
- All-metal Hotend – Allows printing at higher temperatures with flexible filaments.
Mastering Advanced Techniques
Once you have some prints successfully completed, consider exploring more advanced modifications and techniques:
- Enable print monitoring with OctoPrint connected via the printer’s USB port. Allows remote viewing/control.
- Dial in higher detail miniature profiles within your slicer software .
- Experiment with exotic filaments like Wood, Carbon Fiber, and Glow in the Dark.
- Design fully custom terrain pieces and layouts using Tinkercad or Fusion 360.
- Model custom miniature conversion bits and weapons.
The world of 3D printing for tabletop gaming offers unlimited potential for enterprising hobbyists. Let your imagination run wild! As always, please reach out in the comments with any questions as you explore this exciting facet of the larger Warhammer hobby. Happy printing!
Related Articles
- Choosing Excellence: The Best 3D Printers! Discover our guide to the top 3D printers tailored for hobbyists. Elevate your miniature crafting with our expert recommendations, ensuring precision, reliability, and exceptional print quality for your gaming endeavors.
- Mastering Miniature Crafting: A 3D Printing Odyssey! Delve into our guide on using 3D printing for captivating miniature designs. Uncover innovative tactics to bring your unique creations to life on the gaming battlefield.
- Unlocking STL Files for Print Perfection! Navigate the realm of 3D printing with our comprehensive guide to STL files. Refine your skills in handling STL files for optimal print results, ensuring your miniatures boast precision and intricate details.
- Scanning Mastery: Precision in Every Detail! Embark on a journey of precision with our how-to scan models guide. Unlock the secrets to accurate model scanning, providing you with the tools to reproduce intricate details in your miniatures.
- Color Fusion Magic: A Palette of 3D Printing! Immerse yourself in the world of colors with our filament mixing color guide. Learn the art of blending filaments to create mesmerizing color combinations, making your miniatures visually striking on the battlefield.
- Print Perfection: 20 Tips to Elevate Your Game! Elevate your 3D printing skills with our guide for improving 3D print quality. Master 20 tips to enhance the details, durability, and overall aesthetics of your miniature creations for unparalleled success on the battlefield.
- Post-Processing Wizardry Unveiled. Dive into our guide for post-processing 3D prints. Uncover techniques to achieve a flawless finish, ensuring your miniatures not only look impressive but also function seamlessly in the heat of battle.
- Troubleshooting 101: Overcoming Print Challenges. Navigate the intricacies of 3D printing with our guide on fixing common printing problems. Equip yourself with solutions to ensure a smooth printing journey and impeccable results for your miniatures.
- Resin Printing Precision: Orient Like a Pro! Optimize your model orientation with our insights on resin 3D printing success. Discover the strategic positioning techniques that guarantee high-quality prints for your miniature army.
- Slicer Software Demystified for Beginners. Step into the 3D printing world with our beginner’s guide to models in slicer software. Untangle the complexities of slicer programs, empowering you to effortlessly bring your miniatures to life.
- Structural Stability: Conquer Overhangs! Tackle overhangs and bridges confidently with our guide on fixing printing overhangs. Build stable and reliable structures, ensuring your miniatures stand strong on the gaming battlefield.